SAML Security
Configure SAML 2.0 single sign-on for your Vouched account and troubleshoot setup with Okta, Azure AD / Entra ID, or Google Workspace.
Single Sign-On (SSO) with SAML 2.0 lets your team log in to Vouched using your organization's existing identity provider — such as Okta, Azure AD, or Google Workspace — instead of managing separate Vouched credentials. Account administrators can configure this directly from the Vouched dashboard.
Prerequisites
Before you begin:
- Sign in to Vouched with an account that has administrator access.
- Open your identity provider with admin access so you can create or configure an application.
- Confirm that your identity provider supports SAML 2.0.
If SSO is misconfigured, admin users can still log in to Vouched with their password as a fallback.
How SAML SSO works
Understanding the flow helps when you troubleshoot:
- A user navigates to the Vouched login page and enters their email address.
- Vouched detects that the associated account has SSO enabled and automatically redirects the user to your IdP.
- The user authenticates with your IdP.
- Your IdP sends a signed SAML assertion back to Vouched confirming the user's identity and attributes.
- Vouched validates the assertion and logs the user in.
Configure SAML in Vouched
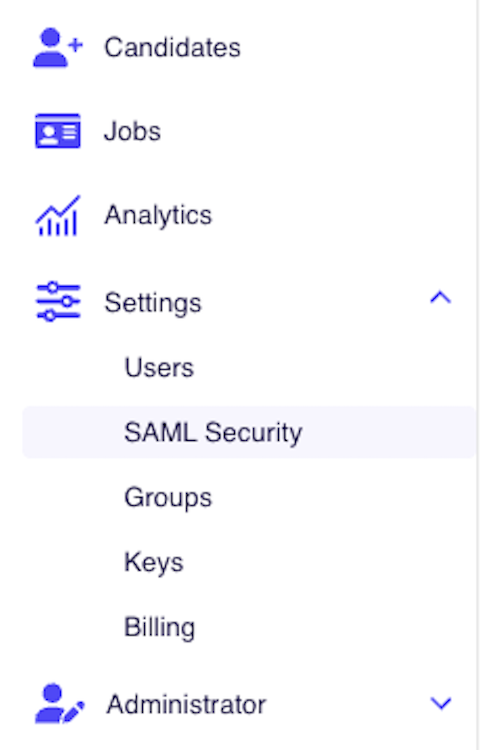
1. Access SAML settings
- Log in to your Vouched account.
- In the left sidebar, navigate to Settings > SAML Security.
2. Provide your IdP metadata
Under SAML Configuration, give Vouched the information it needs to communicate with your IdP.
Choose one method:
- Option A: Metadata URL (recommended) Paste the metadata URL from your IdP into the Metadata URL field. Vouched will fetch the XML automatically. This is preferred because it keeps your configuration current if your IdP rotates certificates.
- Option B: Metadata XML Paste the raw XML from your IdP into the Metadata XML field. Vouched will validate that the XML is well-formed before saving.
Note: You can only use one method at a time. Entering a value in one field will clear the other.
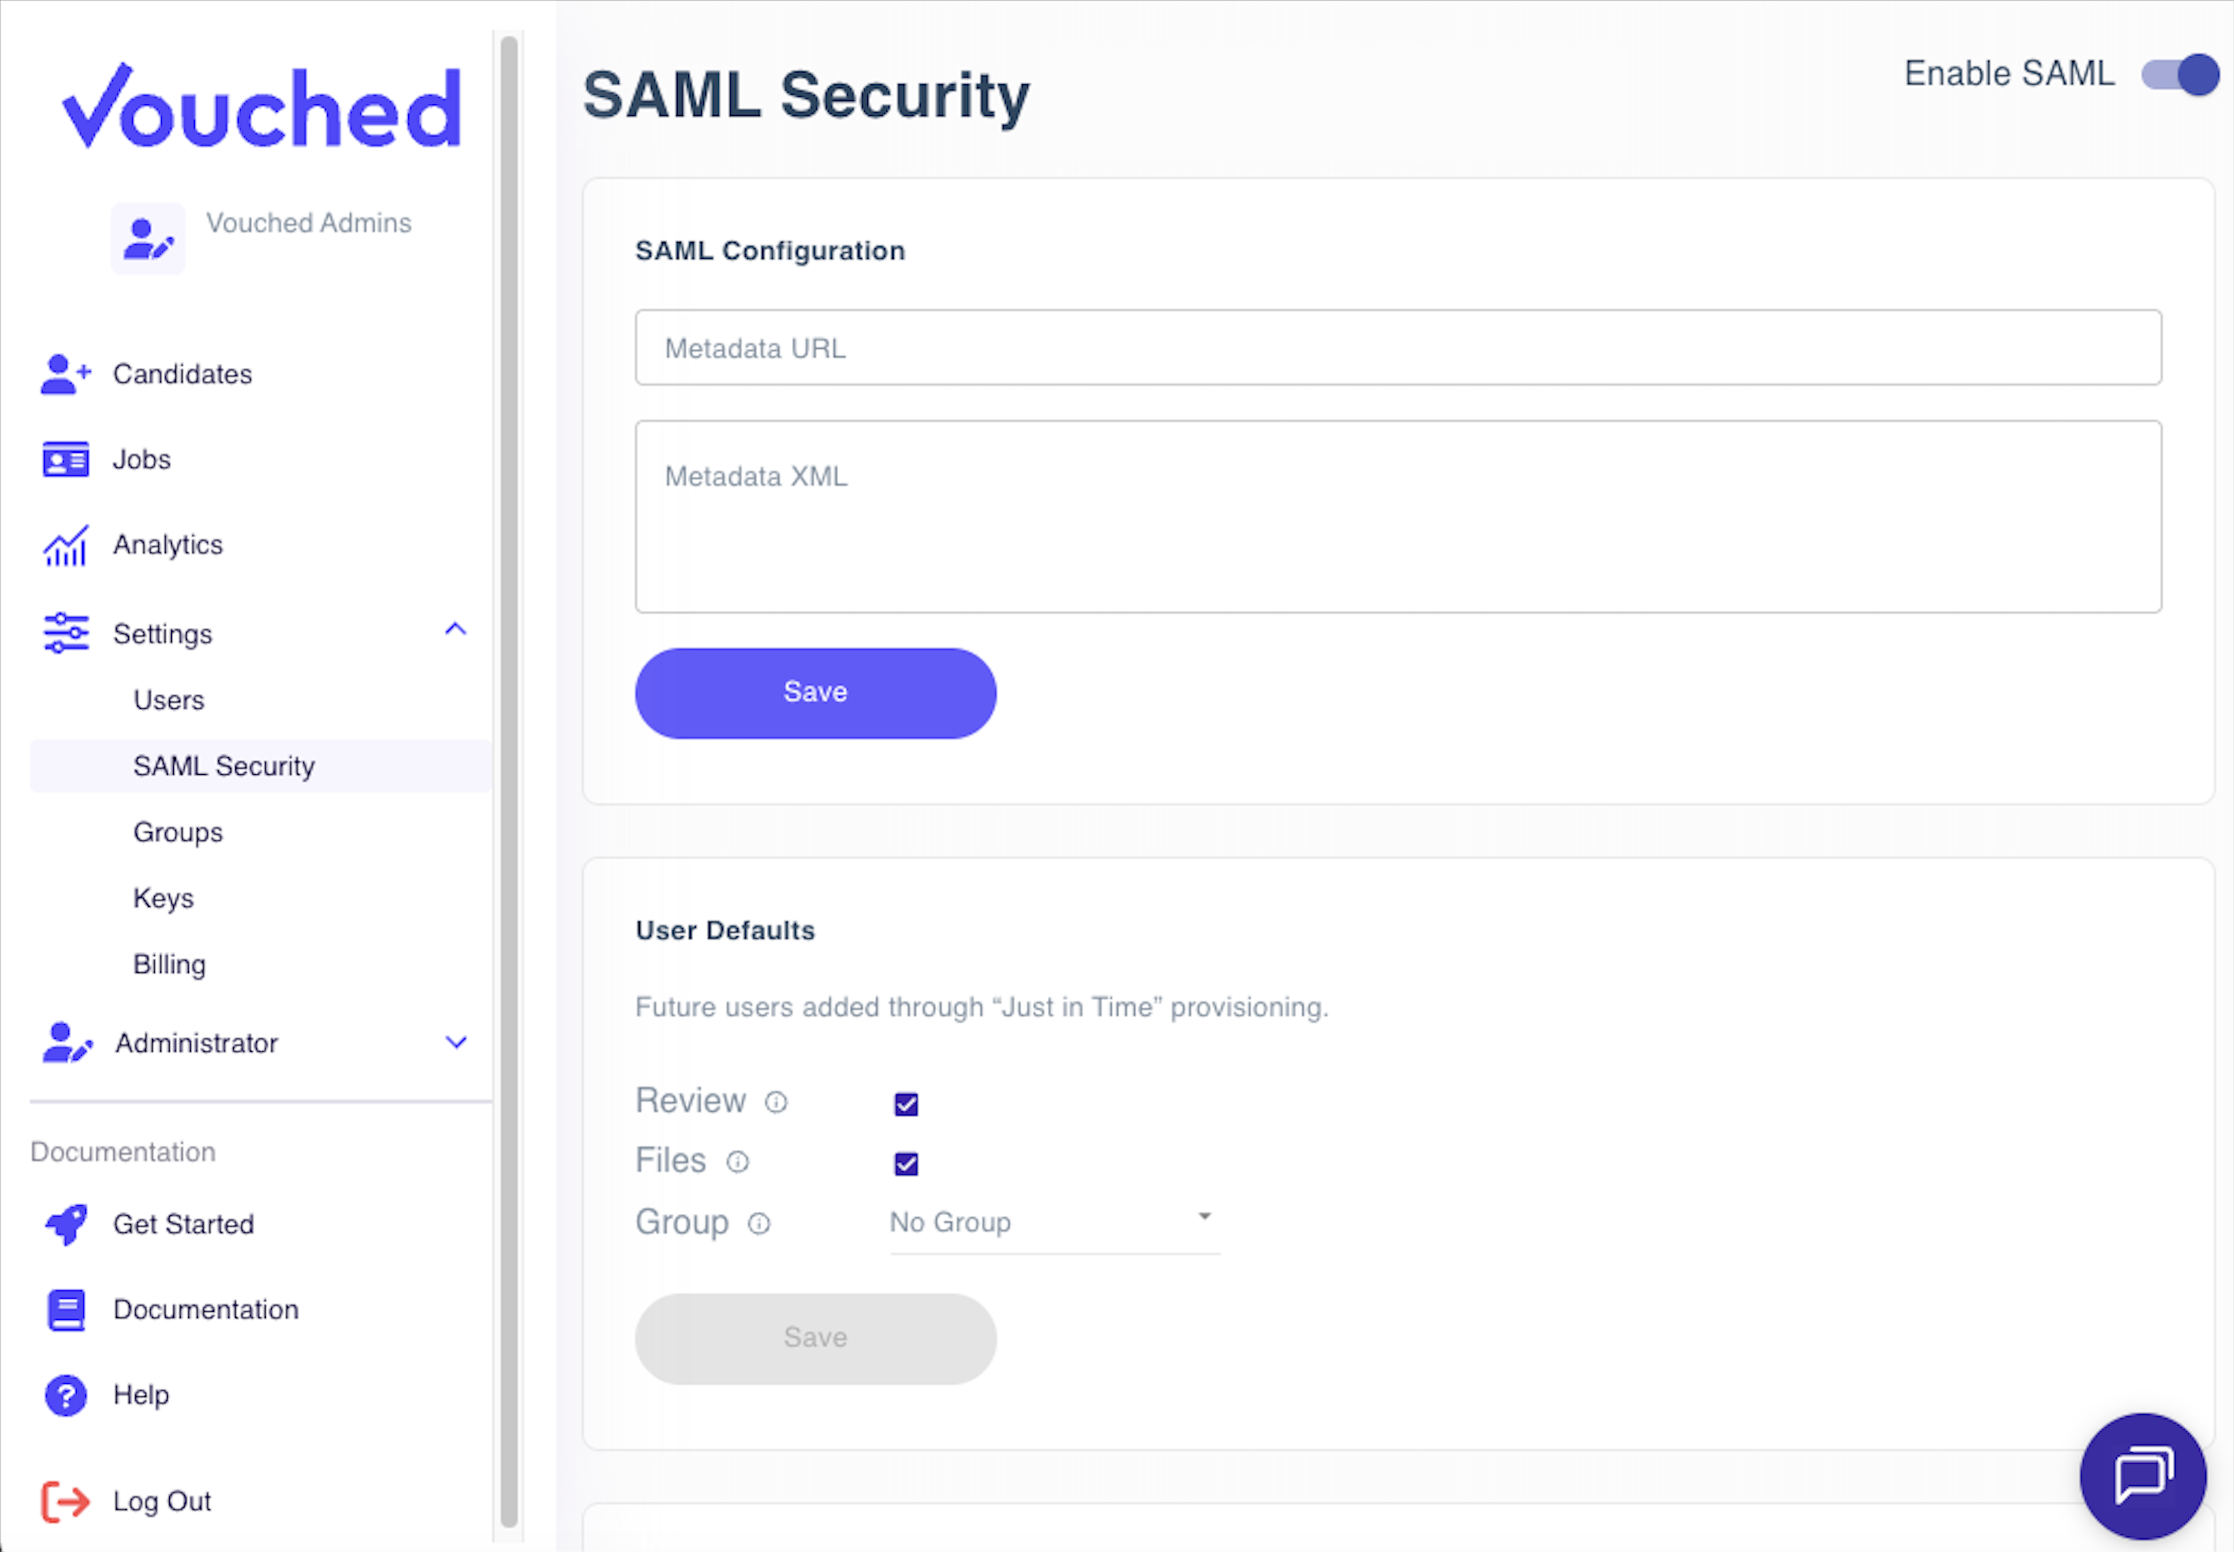
After you enter your metadata, click Save.
Where to find your IdP metadata
| Identity Provider | Where to find metadata |
|---|---|
| Okta | Admin Console → Applications → your app → Sign On tab → Identity Provider metadata link |
| Azure AD / Entra ID | Enterprise Applications → your app → Single sign-on → SAML Signing Certificate section → Federation Metadata XML download |
| Google Workspace | Admin Console → Apps → Web and mobile apps → your app → Download metadata |
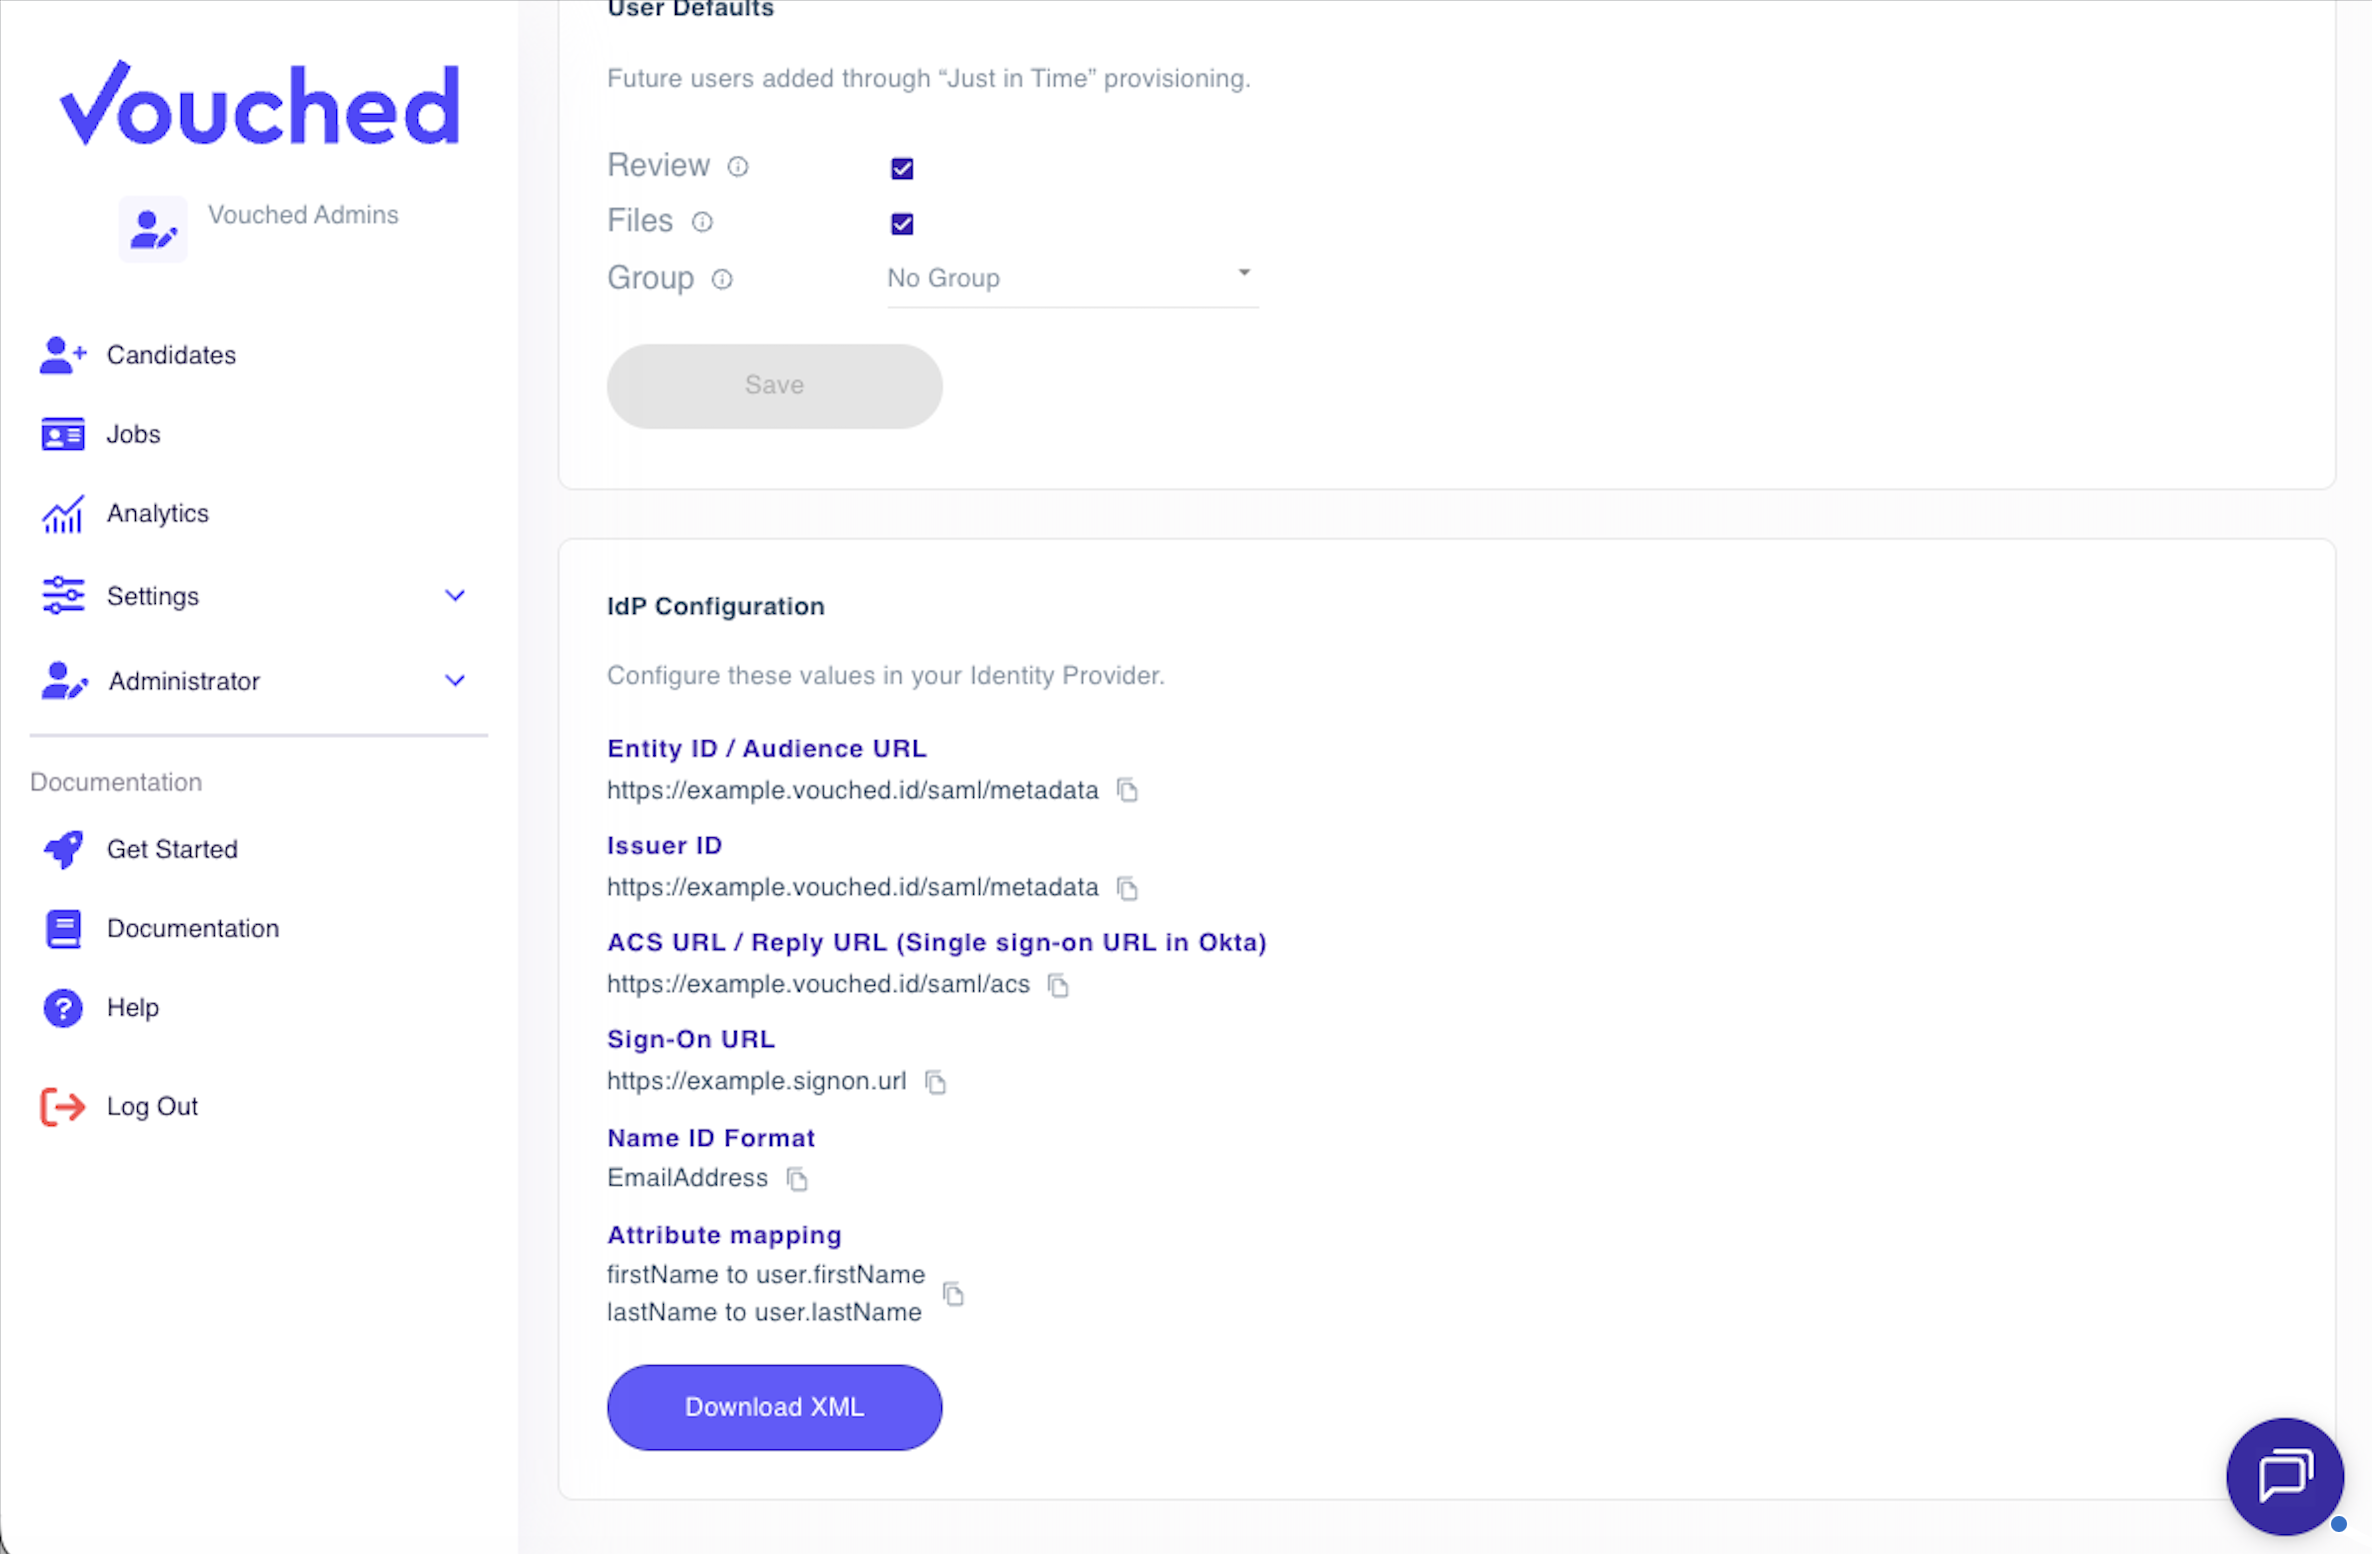
3. Configure your identity provider
After saving your metadata, the IdP Configuration section displays the values you need to enter into your identity provider. Click any value to copy it to your clipboard.
| Field | Description |
|---|---|
| Entity ID / Audience URL | A unique identifier for Vouched as a Service Provider. Some IdPs call this "Audience URI." |
| Issuer ID | Same value as Entity ID. Some IdPs use this label. |
| ACS URL / Reply URL | The URL where your IdP will post SAML assertions after authentication. Okta calls this the "Single sign-on URL." |
| Sign-On URL | The URL users are redirected to when initiating SSO login. |
| Name ID Format | Set this to EmailAddress in your IdP. |
| Attribute Mapping | Map firstName → user.firstName and lastName → user.lastName in your IdP's attribute statements. |
You can also click Download XML to get the Vouched SP metadata file. Some IdPs accept this file to auto-populate the fields above.
IdP-specific setup guides
For step-by-step instructions tailored to your identity provider, see:
- Configuring Vouched SSO with Okta
- Configuring Vouched SSO with Azure AD / Microsoft Entra ID
- Configuring Vouched SSO with Google Workspace
More guides will be added as additional IdPs are supported.
4. Enable SAML
Once your metadata is saved and your IdP is configured:
- Return to Settings > SAML Security in Vouched.
- Use the Enable SAML toggle at the top of the page to activate SSO.

Note: The toggle is disabled until valid metadata has been saved. If you can't enable SAML, make sure you've saved a Metadata URL or XML in Step 2.
When you enable SAML, SSO is activated for all existing Vouched users immediately. Non-admin users will no longer be able to log in with a password, so make sure your IdP is fully configured and tested before enabling it. Admin users retain password login as a fallback.
To disable SSO at any time, toggle Enable SAML off. All users will revert to standard username/password login.
5. Test your configuration
Before rolling SSO out to your entire organization, test with a single user account:
- Open a private or incognito browser window to avoid conflicts with your existing session.
- Navigate to the Vouched login page and initiate SSO login.
- Confirm that:
- You are redirected to your IdP's login page.
- After authenticating, you are returned to Vouched and logged in.
- Your name and email appear correctly in your Vouched profile.
If the test fails, see Troubleshooting.
Just-in-Time (JIT) user provisioning
With JIT provisioning, Vouched automatically creates a user account the first time someone logs in via SSO. You do not need to manually invite each person in advance.
The User Defaults section in SAML Security controls the permissions assigned to these automatically provisioned users:
| Setting | Description |
|---|---|
| Review | User can review verification results. |
| Files | User can download verification reports. |
| Group | User is placed into this group upon creation. If no group is set, the user can view all jobs for the account. |
Set these defaults to match the access level appropriate for most SSO users at your organization, then click Save.
Important notes about JIT provisioning:
- JIT provisioning only applies to users logging in via SSO for the first time.
- Existing Vouched users are automatically switched to SSO login when SAML is enabled. Their permissions remain unchanged, but they will no longer be able to log in with a password, except for admin users.
- If you previously sent an email invitation to a user, JIT provisioning will still apply when they log in via SSO for the first time. Their pending invite will be automatically closed out at that point.
- Users who are removed or disabled in your IdP will no longer be able to log in to Vouched via SSO, but their Vouched account is not automatically deleted.
Troubleshooting
The "Enable SAML" toggle is grayed out
You must save valid IdP metadata before you can enable SAML. Go to the SAML Configuration section, enter your metadata URL or XML, and click Save.
Users are redirected to the IdP but see an error there
This usually means the application isn't fully configured in your IdP, or the ACS URL / Entity ID values entered in the IdP don't match exactly what Vouched provided.
Check for:
- Extra spaces or a missing trailing slash in the ACS URL or Entity ID
httpvshttpsmismatch- A typo in the Entity ID, which is case-sensitive
Users are redirected back to Vouched but see a "SAML error" or are not logged in
Common causes include:
- Attribute mapping is missing or incorrect. Confirm that
firstNameandlastNameare mapped in your IdP's attribute statements, and that the attribute names match exactly. - Name ID format mismatch. Make sure your IdP is configured to send
EmailAddressas the Name ID format. - Expired or mismatched certificate. If you used Metadata XML instead of a Metadata URL, your IdP may have rotated its certificate. Re-download and re-paste the latest metadata XML, or switch to the Metadata URL method.
- Clock skew. SAML assertions include strict timestamp validity windows. If your server's clock is off by more than a few minutes, assertions may be rejected. Ensure your systems are synchronized with a time server.
A specific user can't log in, but others can
- Confirm the user exists in your IdP and is assigned to the Vouched application.
- Check that their IdP email address matches their Vouched account email, if they have an existing account.
- If you previously invited the user by email, they will be JIT provisioned when they log in via SSO and their pending invite will be closed out automatically.
SSO was working and suddenly stopped
A common cause is an expired or rotated IdP certificate.
To resolve:
- If using Metadata URL: Vouched should fetch the latest automatically. Try saving the metadata again to force a refresh.
- If using Metadata XML: Download the latest metadata XML from your IdP and re-paste it in the Metadata XML field, then save.
Security considerations
- Use Metadata URL over Metadata XML when possible. This ensures Vouched automatically picks up certificate rotations from your IdP without manual intervention.
- Review JIT defaults carefully. Users provisioned via SSO receive the permissions set in User Defaults. Set these conservatively and adjust individual users as needed.
- Disable SSO before major IdP changes. If you're migrating to a new IdP or making significant changes to your IdP configuration, disable SSO in Vouched first to avoid locking users out during the transition.
Frequently asked questions
Can I use multiple identity providers?
No, Vouched currently supports one SAML configuration per account.
What happens to existing users when I enable SSO?
All existing Vouched users are automatically switched to SSO login. Non-admin users will no longer be able to log in with a password and must authenticate through your IdP. Admin users retain password login as a fallback. Existing users' permissions are not changed.
Do I need to pre-create users in Vouched before they can use SSO?
No. With JIT provisioning enabled, user accounts are created automatically on first login. Pre-assigning the correct User Defaults ahead of time ensures new users get the right access level.
What happens when a user is removed from our IdP?
They will no longer be able to authenticate via SSO. Their Vouched account is not automatically deleted, but they cannot log in. Admins can manually deactivate or delete the user in Vouched if needed.
Is IdP-initiated SSO supported?
Yes. Users can initiate login from your IdP's app dashboard and will be redirected to Vouched automatically after authenticating.
Need help?
Contact Vouched support with a description of your IdP, the error message you're seeing, and the step where the issue occurs.
Updated 2 months ago